Photo annotation setup script
March 18, 2012 at 11:34 PM by Dr. Drang
I’ve been using OmniGraffle to annotate photos for years. I love the results, but there’s always been more fiddly setup than I’d like. I recently wrote a script to handle some of the fiddling.
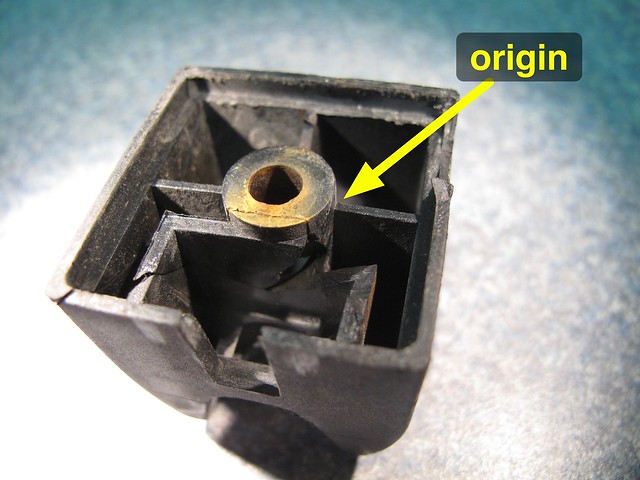
The kind of annotation I do regularly is similar to what I did in this photo from the update to my broken bracket post.
I know lots of people use Skitch, and I’d be happy to use it, too, if my annotations were all for images in my blog or email. But most of my annotated photos go into my reports for work, and Skitch’s arrows and text are too cartoony for that. I could use both—OmniGraffle for formal work and Skitch for the blog—but I’d rather focus on just one system.
My workflow for annotating photos in OmniGraffle goes like this:
- Import photo.
- Resize photo so it fits on one page. OmniGraffle initially sizes the photo according to its X Resolution and Y Resolution meta data. The images from my Canon G10 are 4416 pixels wide and have an X Resolution of 180 pixels/per inch, so they start out over 24 inches wide in OmniGraffle.
- Lock the imported photo in place so I don’t accidentally move, resize, or delete it.
- Add the annotations.
- Export the resulting image as a JPEG with the proper resolution. What is the proper resolution? Well, that depends on the original size of the photo (in pixels) and the size I shrunk it to in Step 2 (in inches). The math is just the division of one number by another, but I do have to look up (or remember) the two numbers first.
Step 4 has to be done by hand, but the others can be automated. Here’s the AppleScript I use.
1 tell application "Finder"
2 set theItem to the selection as alias
3 set thePath to POSIX path of (theItem as text)
4 end tell
5
6 tell application "Image Events"
7 set theImage to open thePath
8 set imgSize to dimensions of theImage
9 end tell
10
11 set w to 6 * 72
12 set h to w * (item 2 of imgSize) / (item 1 of imgSize)
13 set res to (item 1 of imgSize) / w
14
15 tell application "OmniGraffle 5"
16 activate
17 tell canvas of front window
18 make new solid at beginning of graphics with properties¬
19 {size:{w, h}, origin:{1 * 72, 1 * 72}, fill:no fill,¬
20 draws shadow:false, draws stroke:false, locked:true,¬
21 image:thePath}
22 end tell
23 set resolution of current export settings to res
24 set area type of current export settings to all graphics
25 set export scale of current export settings to 1.0
26 end tell
When I call it, I have OmniGraffle open to a blank document and the image I want to annotate selected in the Finder. The script imports the image, resizes it to 6 inches wide, locks it, and sets the output scale and resolution for the exported JPEG.
Although I normally have OmniGraffle using inches as the measurement unit when I’m working with it by hand, it wants points for the width and height when they’re being set via AppleScript. That’s why Line 11 sets the variable w to 6 * 72 instead of just 6. Similarly, the output resolution in Line 13 has to be set in pixels/point rather than pixels/inch.
Right now I have this script set up to be called via FastScripts
-
Speaking of FastScripts, Daniel Jalkut was on a recent episode of the Mac Power Users podcast where he talked up Skitch as a great app/service for marking up screenshots. Again, I don’t doubt that, but I’m sticking with OmniGraffle. ↩


